Have you ever wanted to transform a 3d printed part into metal?
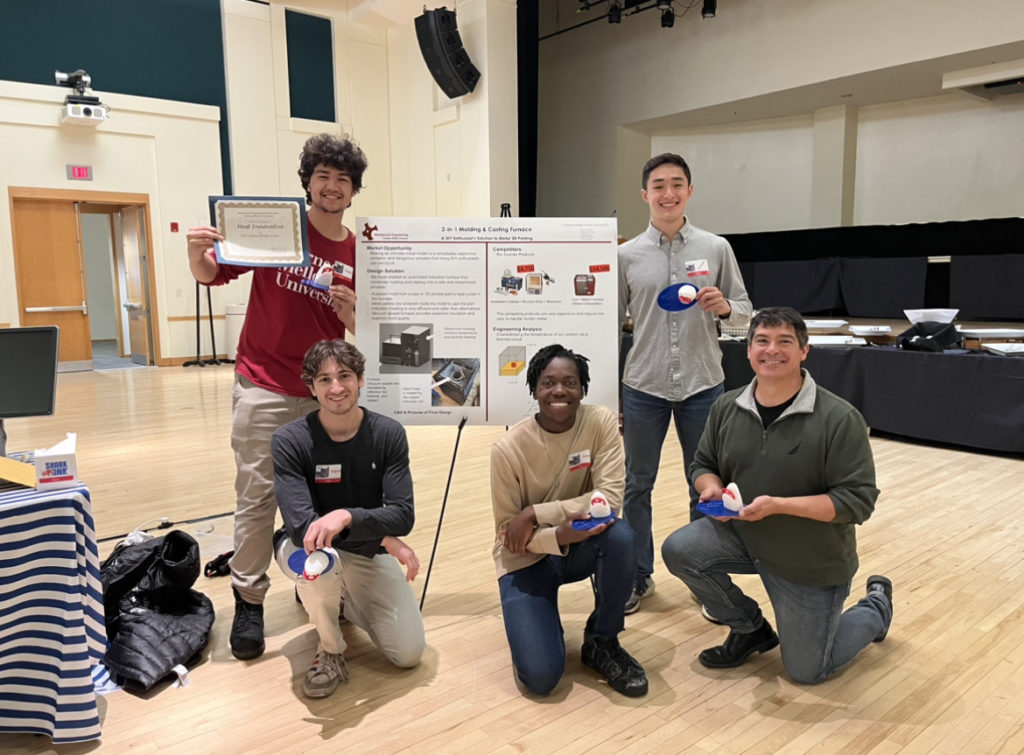
DIY hobbyists are often faced with the challenge of making intricate custom parts for projects. For many parts, metal is the ideal material due to its high strength and low elasticity. However, working with metal is out of reach for many. Metal 3D printers can cost hundreds of thousands of dollars. Casting is another option, but current casting machines on the market are upwards to $10,000, require multiple different systems to complete te process, and require the user to directly interact with molten metal. To solve this our capstone team set out to build a machine that combine all of the elements of molding and casting into one machine with a budget of $1000. Our ultimate goal was for a user to be able to take a part that they designed and 3d printed, and transform that same part into a solid metal version. This project was completed by a team of 5 students over a 5 month span as part of Carnegie Mellon’s engineering design 2 course. It was presented at Carnegie Mellon’s Engineering Design Expo, a collection of teams across 5 different courses, where it won the ‘Most Innovative Design Award’.
Design
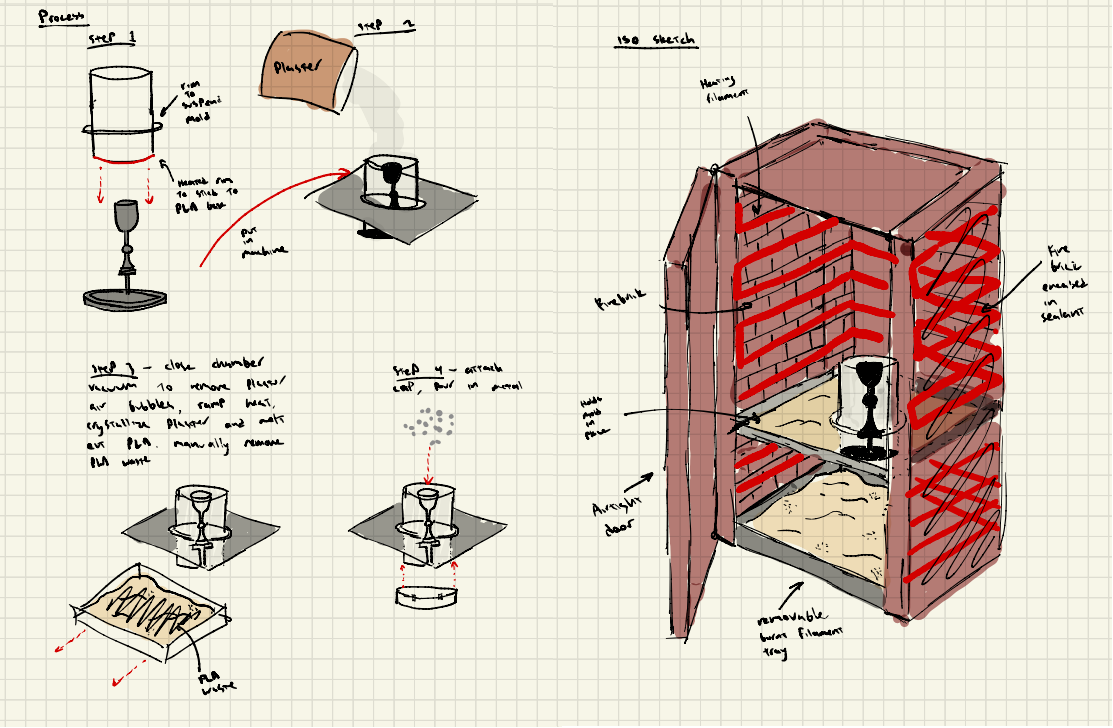
We began the design process by researching what was most important to our target user in a machine like this. We determined form factor, ease of use, and safety were the most important features to focus on. Shown on the right are some early sketches I made of the desired casting workflow, as well as a furnace concept to melt the metal. Our machine needed to complete 3 processes:
1) Create an airbubble free plaster mold around a 3d printed part
2) Melt the PLA out of the plaster mold an cure plaster to leave a cavity in the shape of the part
3) Melt metal inside the mold
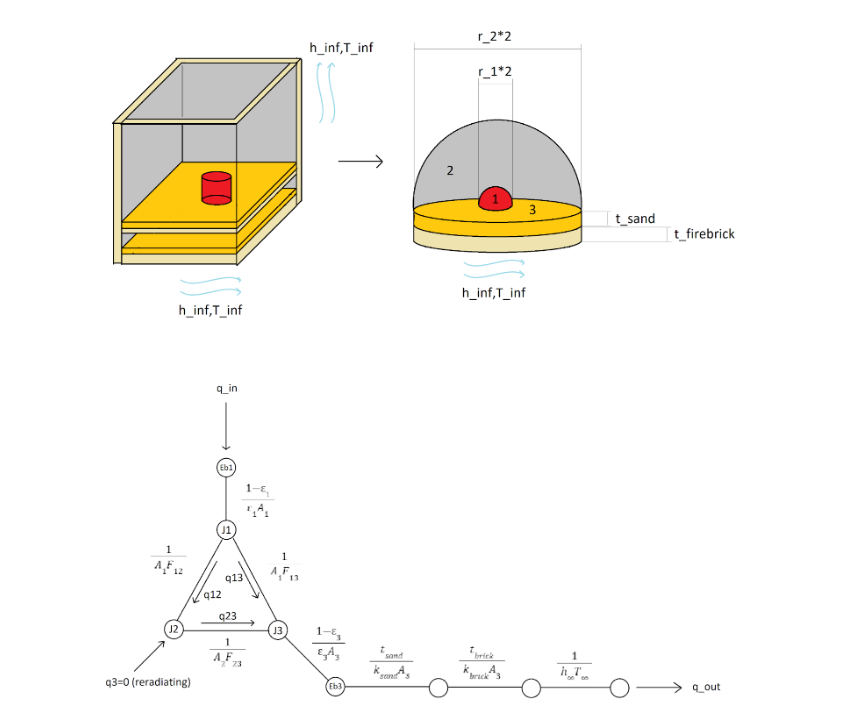
I was the analysis and testing lead for our team, and therefore did some early steady state heat transfer analysis to determine potential failure points and the temperatures of different parts of the chamber. Our thermal circuit used to derive power requirements and wall temperatures is shown below
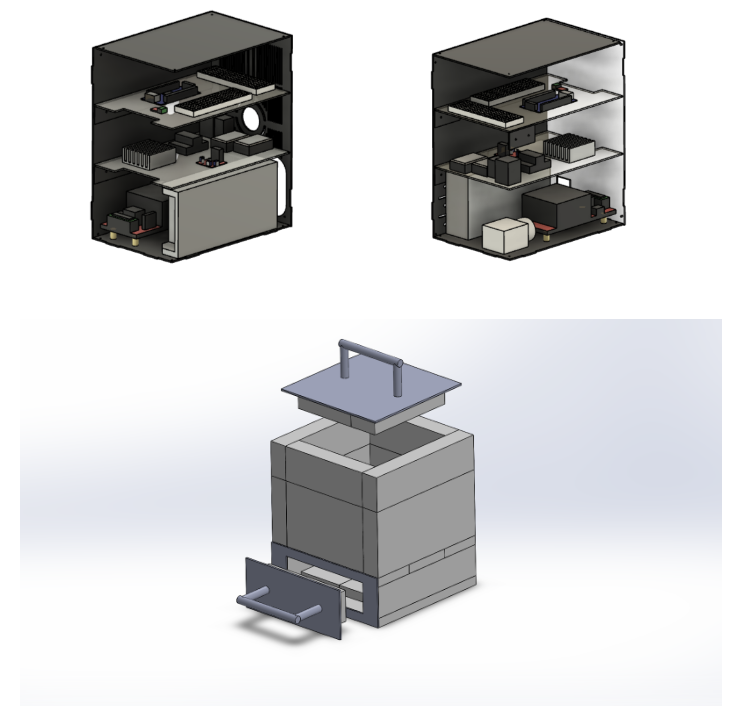
prototyping
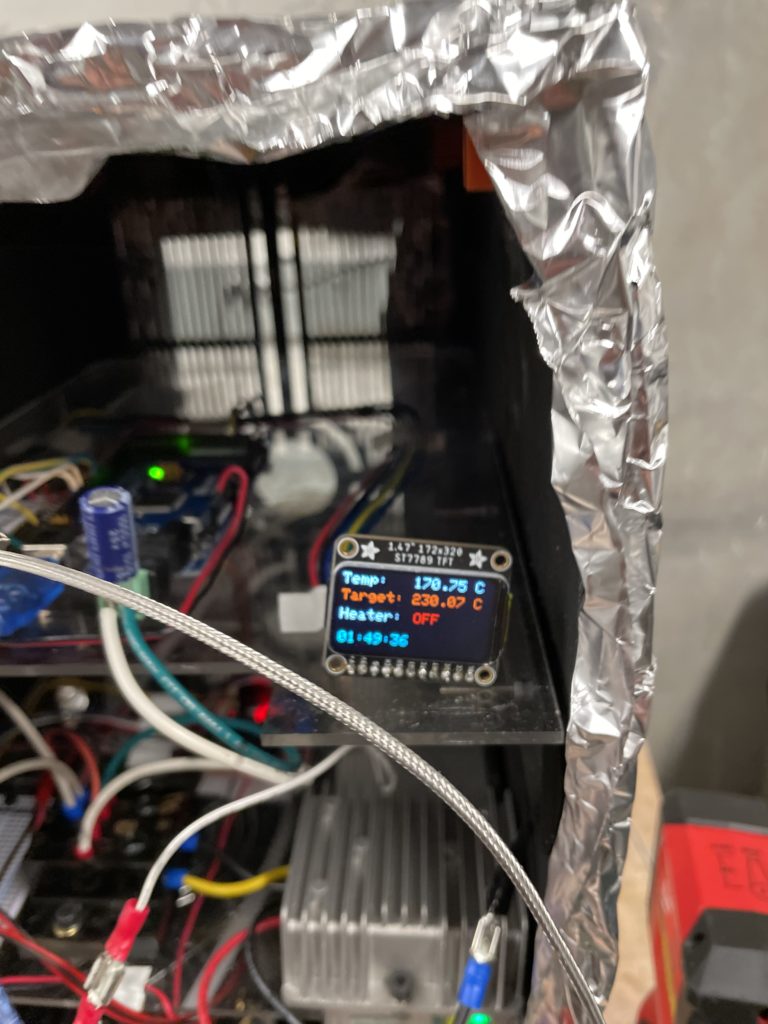
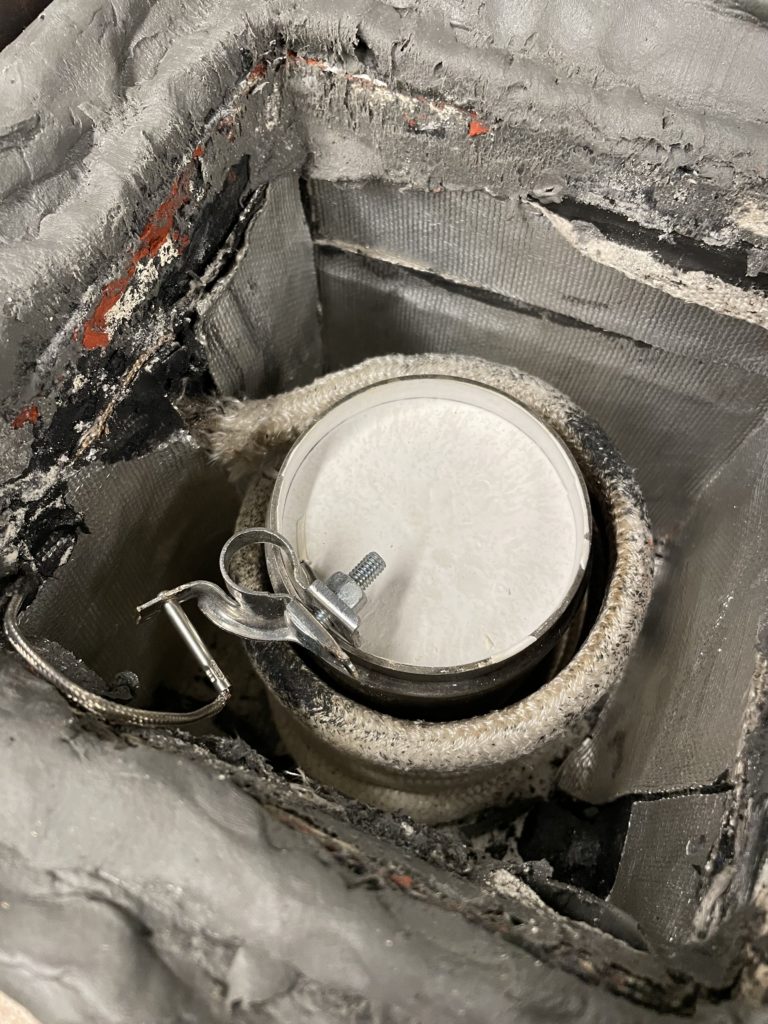
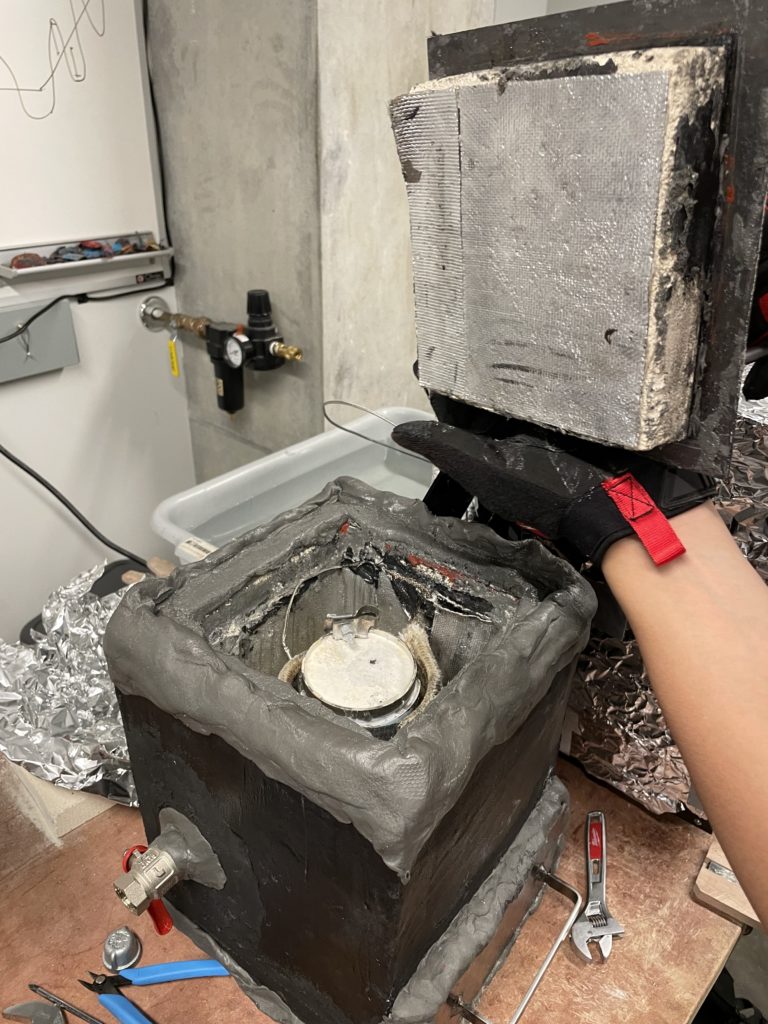
There two parts of the machine that needed to be prototyped, the casting chamber, where the crucible, the mold, and the heating element would be housed, and the electronics box. We chose induction as our method of heating. I machined a custom steel crucible to fit inside our custom induction coil. The idea was that the crucible would be placed inside the coil, would heat up rapidly when the induction heater was powered and could warm the contents of the crucible via conduction. The induction chamber also included a thermocouple that could be mounted to the crucible to monitor its temperature. This was used, alongside a control algorithm, to create a specific temperature ramp curve that could be used to cure our plaster.
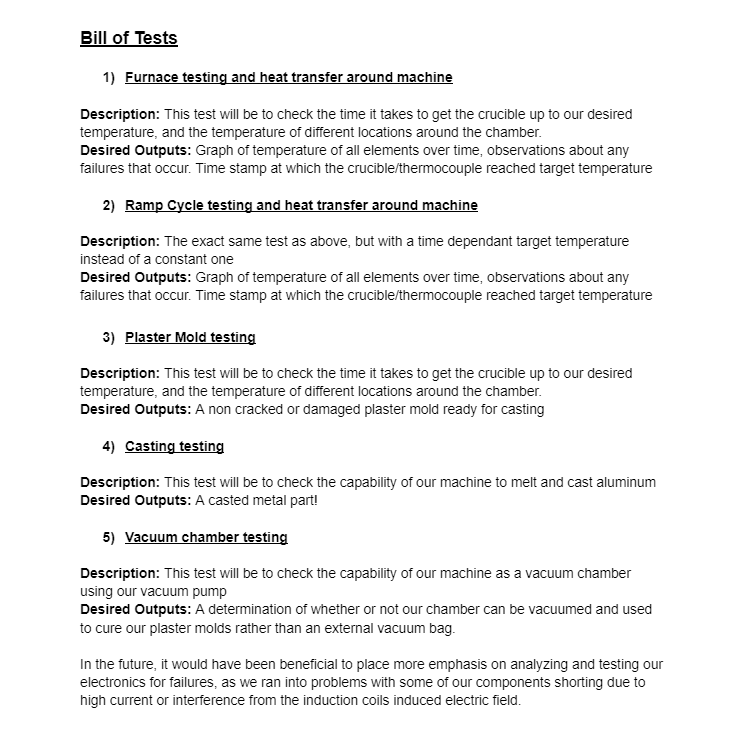
Testing
A testing plan was designed to identify any failures within our machine, benchmark its performance, and slowly work up to casting a metal part. Below is a summary of the tests performed:
Testing was conducted over the final week of the course. Some of the main conclusions drawn from testing were:
The crucible reached a temperature of 1000F in 1 hour and 32 minutes. Temperature rose rapidly initially, but tapered off, eventually climbing at a rate of 1 degree per minute.
Our desired crucible temperature vs our true crucible temperature differed by an average of 20.3F over the course of our ramp cycle. This test was ran for 8 hours, but the electronics failed after roughly 6 hours, and the induction board was repaired
Our heating and vacuum chamber achieved a pressure of 25.1mmgh.
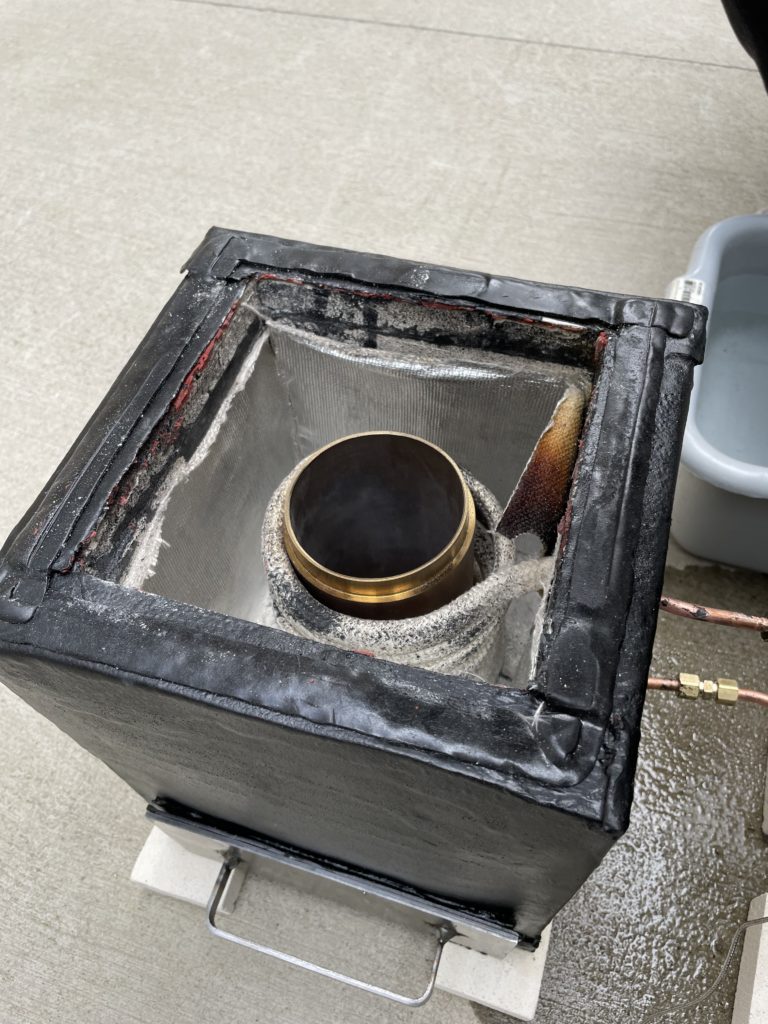
Casting and Result
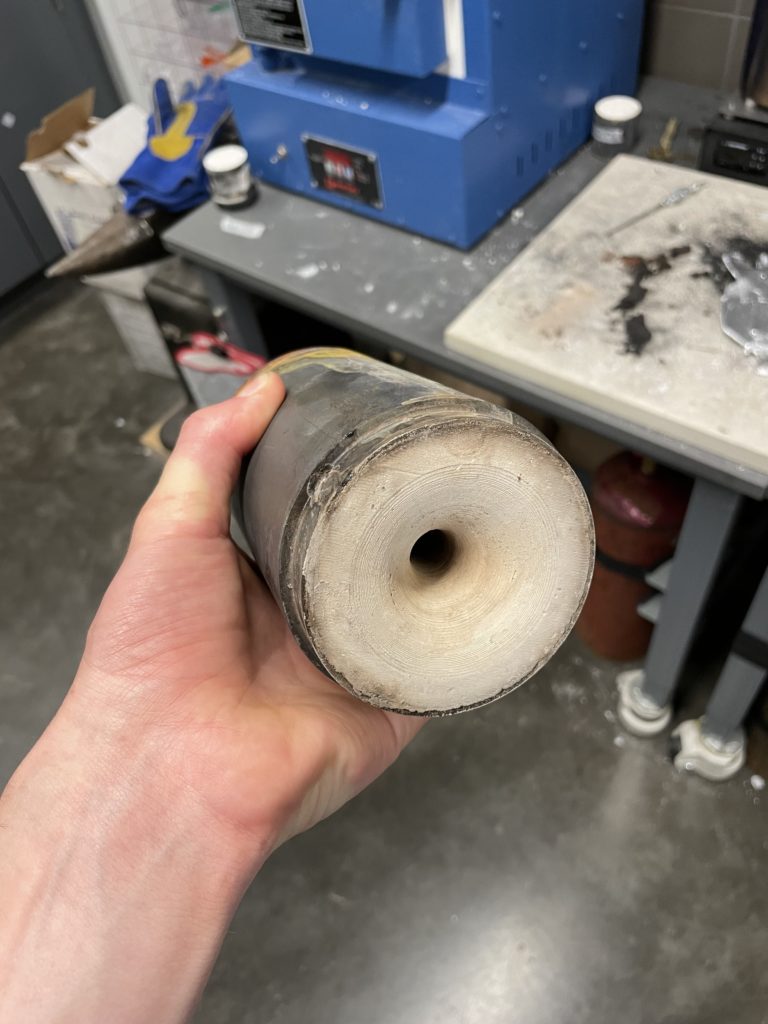
Mold making
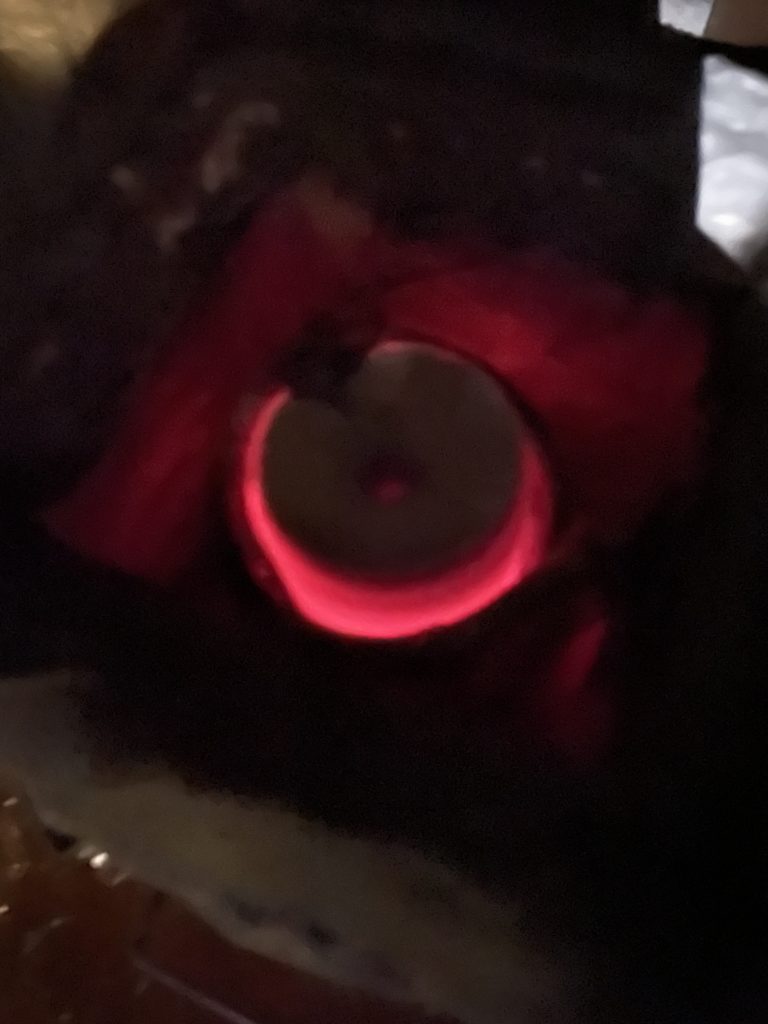
Plaster Curing and burnout
Casting
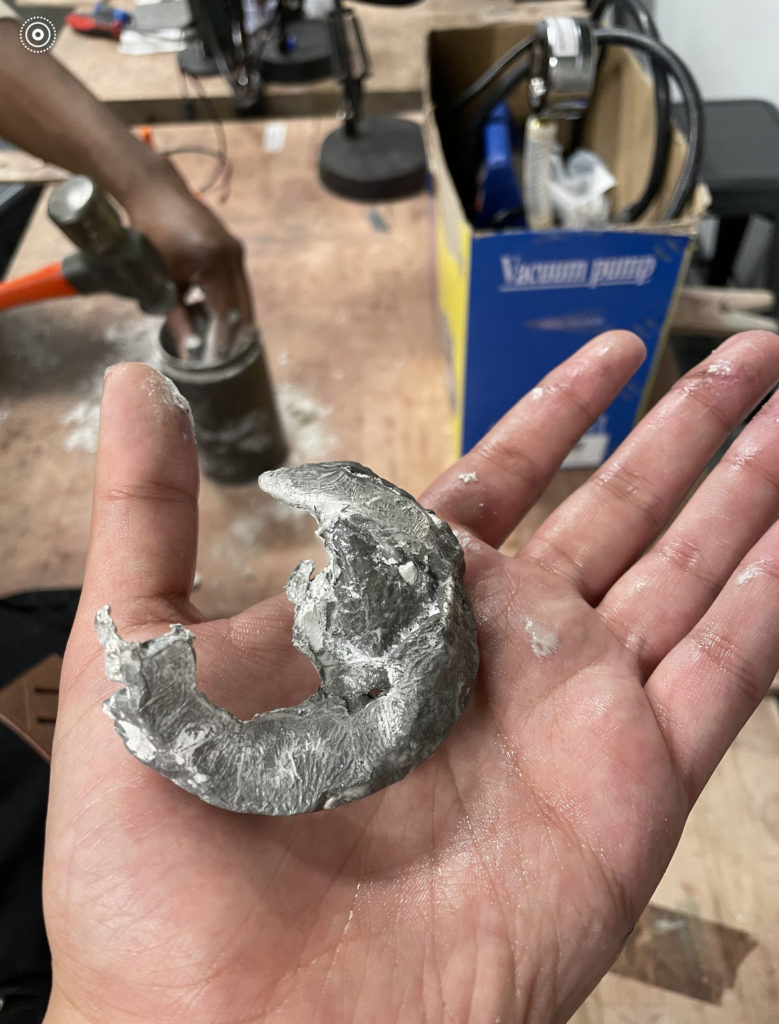
Our mold cracked during our final casting trial, resulting in a strange shape
Conclusions
Although our mold cracked in our final cast resulting in an unrecognizable metal part, our final prototype had all of the capabiltiies necessary to create a quility casted part- vaccuuming the plaster mold, curing the the mold and doing PLA burnout, and melting metal. had we had an extra week to fine tune our plaster curing process, I am confident we could have replicated a 3D printed part accurately
Although this project had plenty of challenges and things didn’t go exactly according to plan in the end, this was one of the most rewarding projects I have ever worked on and the one where I learned the most. I would love to do an eventual redesign, fine tune the casting process, and eventually bring the product to market!